AtomCraft
1. Introduction
Welcome to AtomCraft! The education experience to understand what different atoms are made up of. Users will learn how to create a Hydrogen atom (easy task) and Lithium atom (difficult task). This experience educates users of all ages to either learn for the first time or repeat their knowledge of the Bohr atom structure and what atoms are made of. AtomCraft enables an exciting and educational way of engaging with physics!
2. Design Process
This project is part of the Design for Emerging Technologies Course at Stockholm University, aiming to create an educational experience using immersive technologies. The design process includes ideation of concepts and interactions, testing of technologies, creation of Unity scene, user testing, iteration, and demonstration.
2.1 Project Timeline:
Before starting the design process the AtomCraft team made sure the plan the timeline to manage deadlines for the project. Below you can find a visualization of the deadline of the project created in a Miro board. Additionally, the team followed a Kanban board to track and assign specific tasks.

2.2 Ideation of concept and interaction:
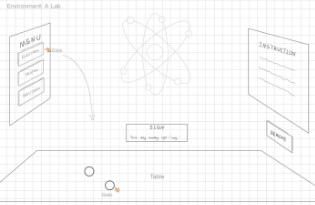
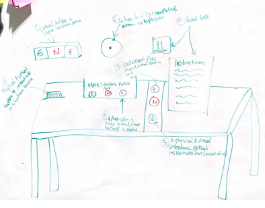
To come up with an immersive educational experience, the team members individually first came up with one idea of an experience each, and then from a discussion we were able to continue building and combining our ideas into the experience AtomCraft. Through further brainstorming and ideation, the team developed the idea by drawing sketches which can be seen below.
2.3 Testing technologies:
To understand which technologies will enable our educational experience, the team members tried various technologies and tools to see which one works best for the different interactions.
2.3.1 Matching virtual and physical objects:
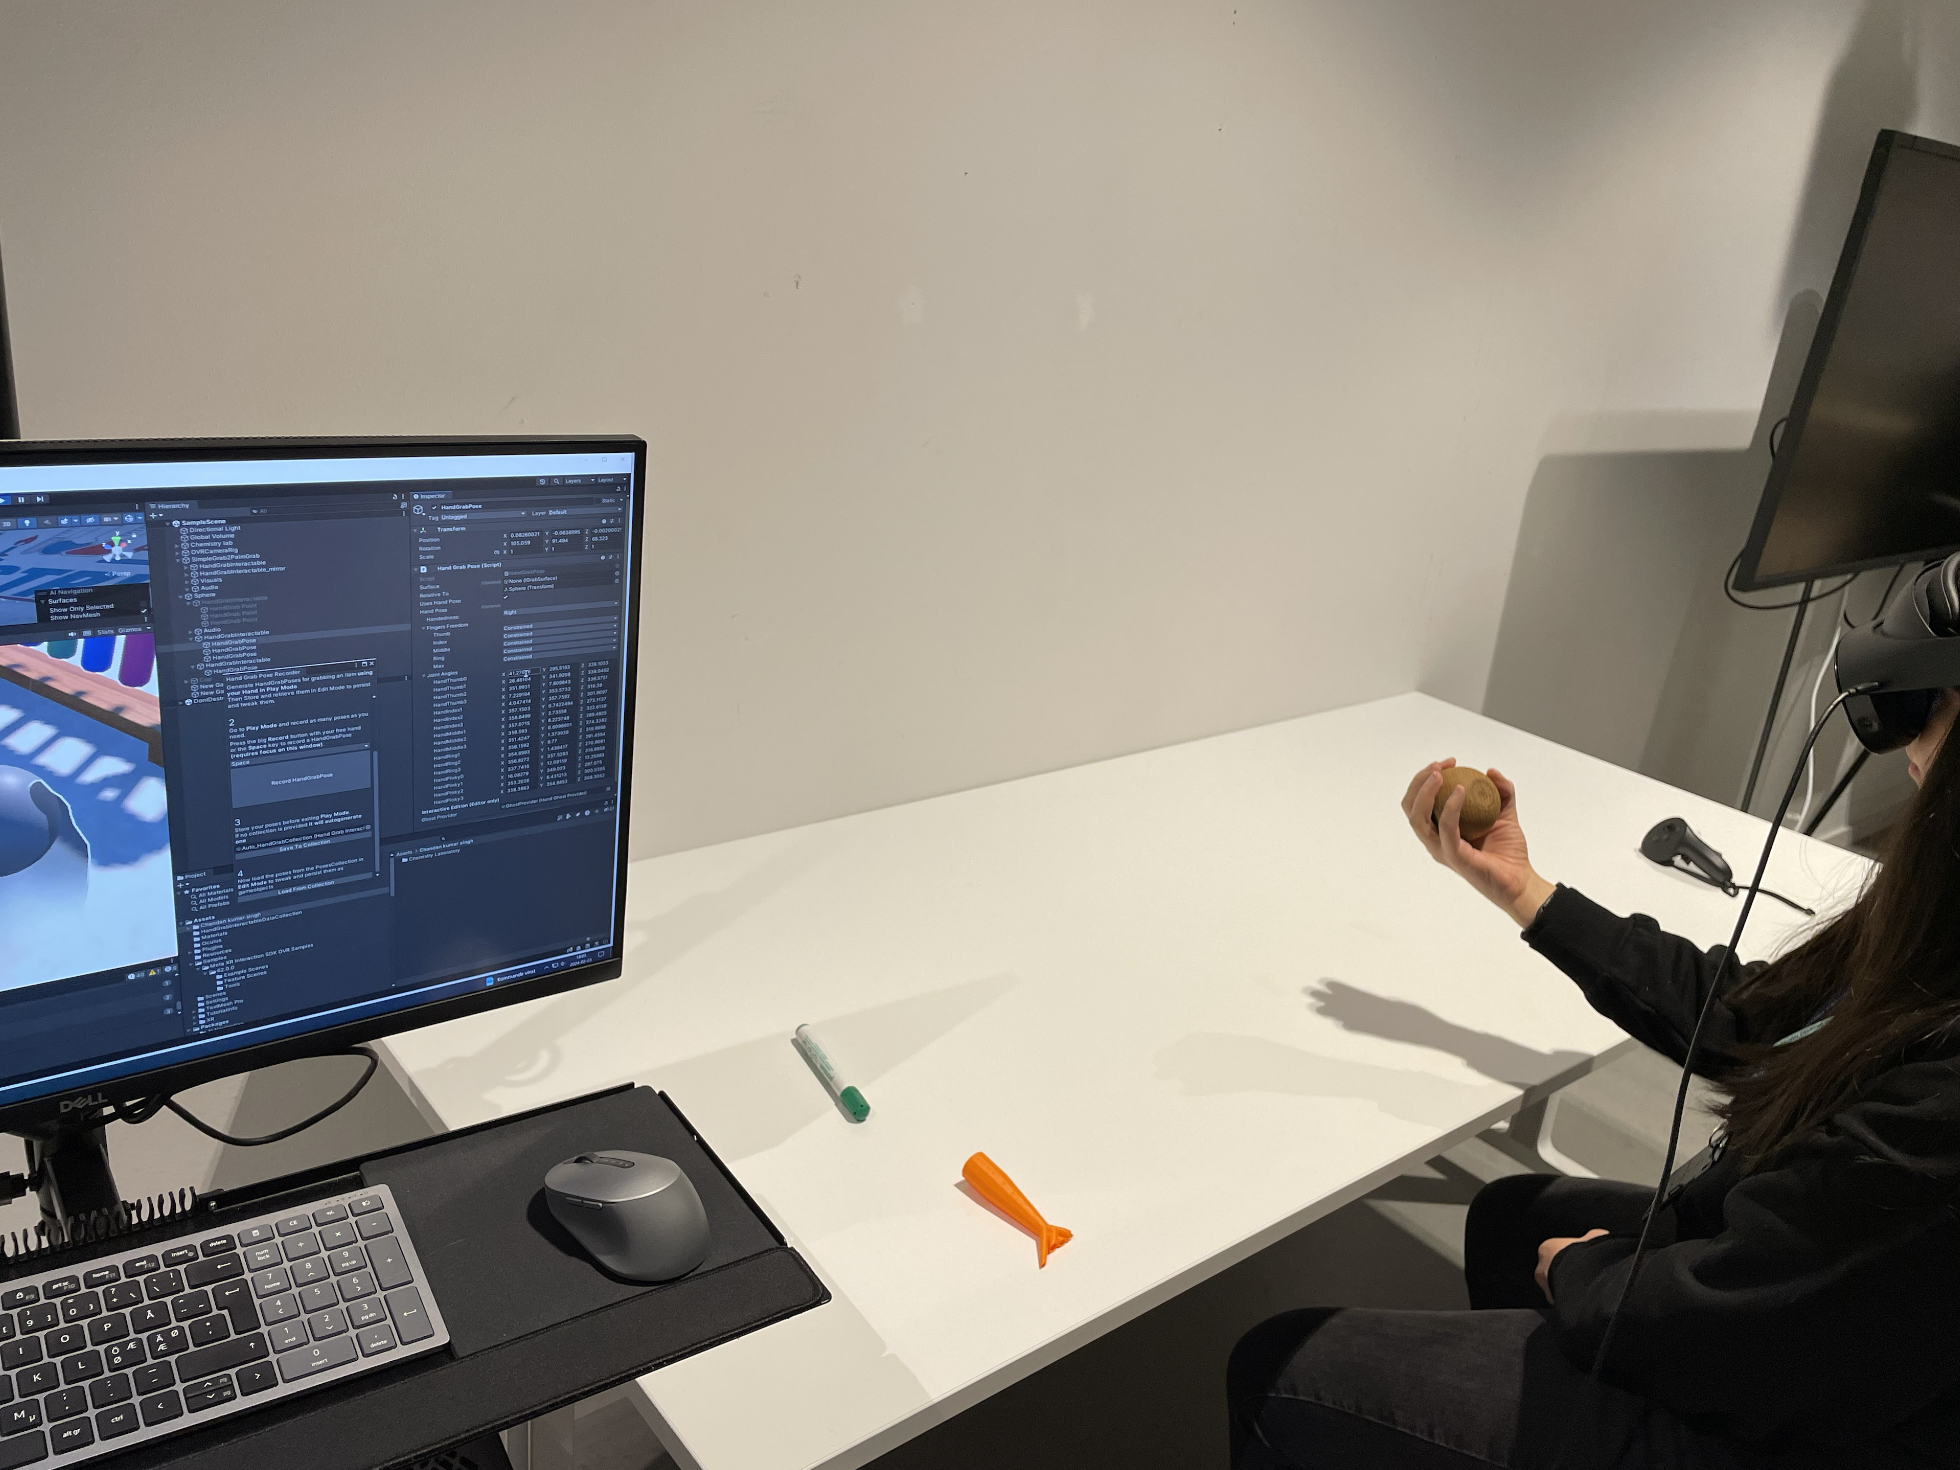
Since this experience uses virtual reality (VR) technology and tangible interactions, it will be using both virtual and physical objects. The experience includes objects that the user can interact with both in the virtual and physical world, and it is important that these objects are matched in their location, size, and texture. The images below document the testing of matching the position of a physical table to a virtual table, and also matching the position and grab interaction to a physical and virtual sphere.
2.3.2 Sensors:
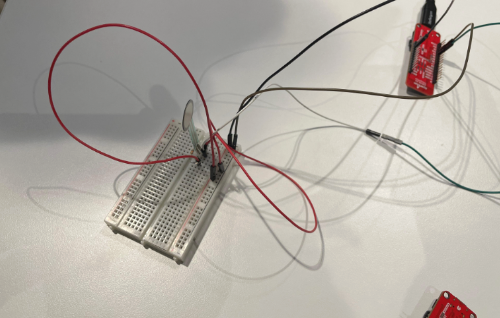
The experience includes sensors that can trigger a reaction in the experience. ESP installation using a light sensor was used to test how a button can be used. The light sensor was only used as a placeholder and instead, there will be a button used. The button will be created to instantiate objects in the virtual environment.
2.3.4 3D Printing:
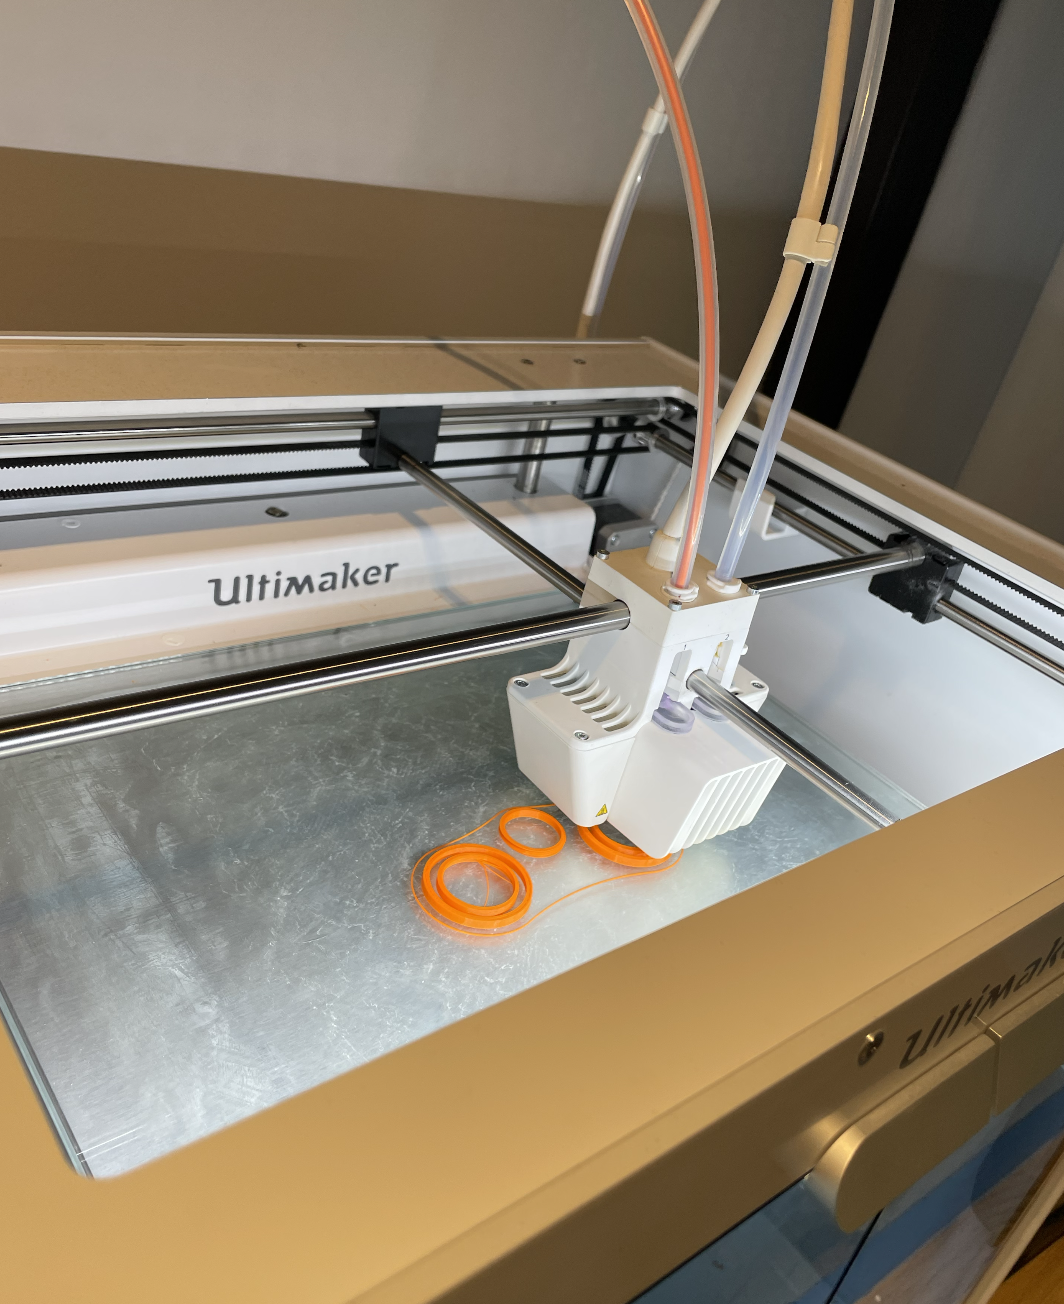
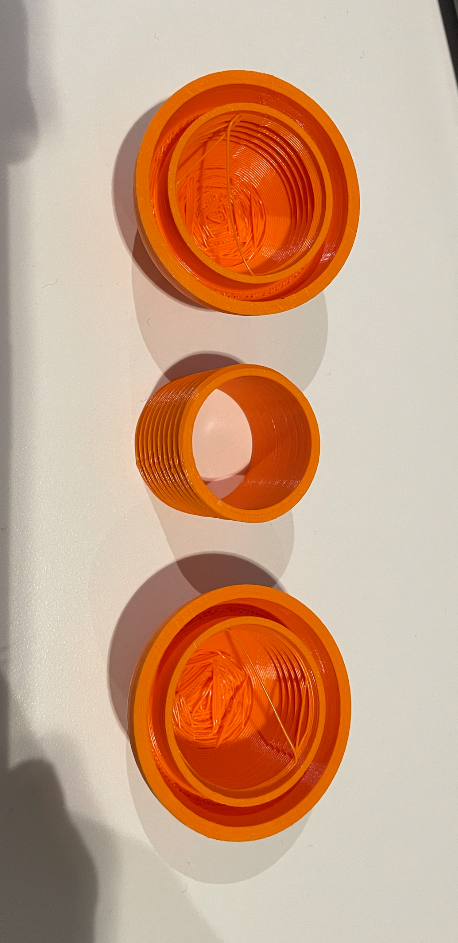
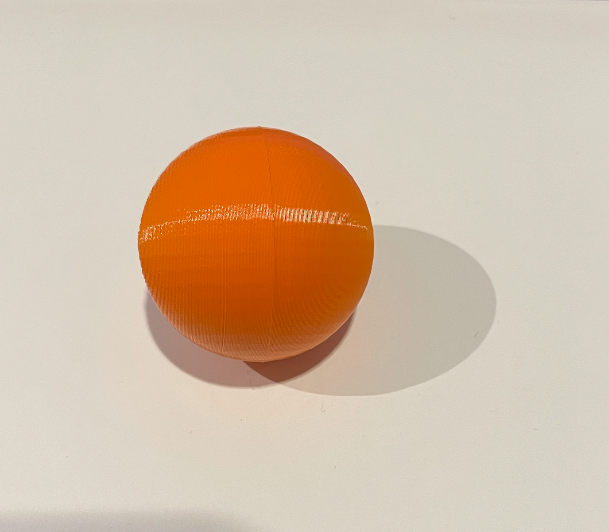
Using templates from Thingiverse the team was able to 3D print spheres that represent protons and neutrons. The sphere template is taken from the following creator: ark19 and below are image showing its printed form.
Additionally, to increase immersion, a physical button was also included in the experiences where a template from Thingiverse also was used. The button template is taken from the following creator: PredatorJr and below are images of its STL file.
2.4 Testing:
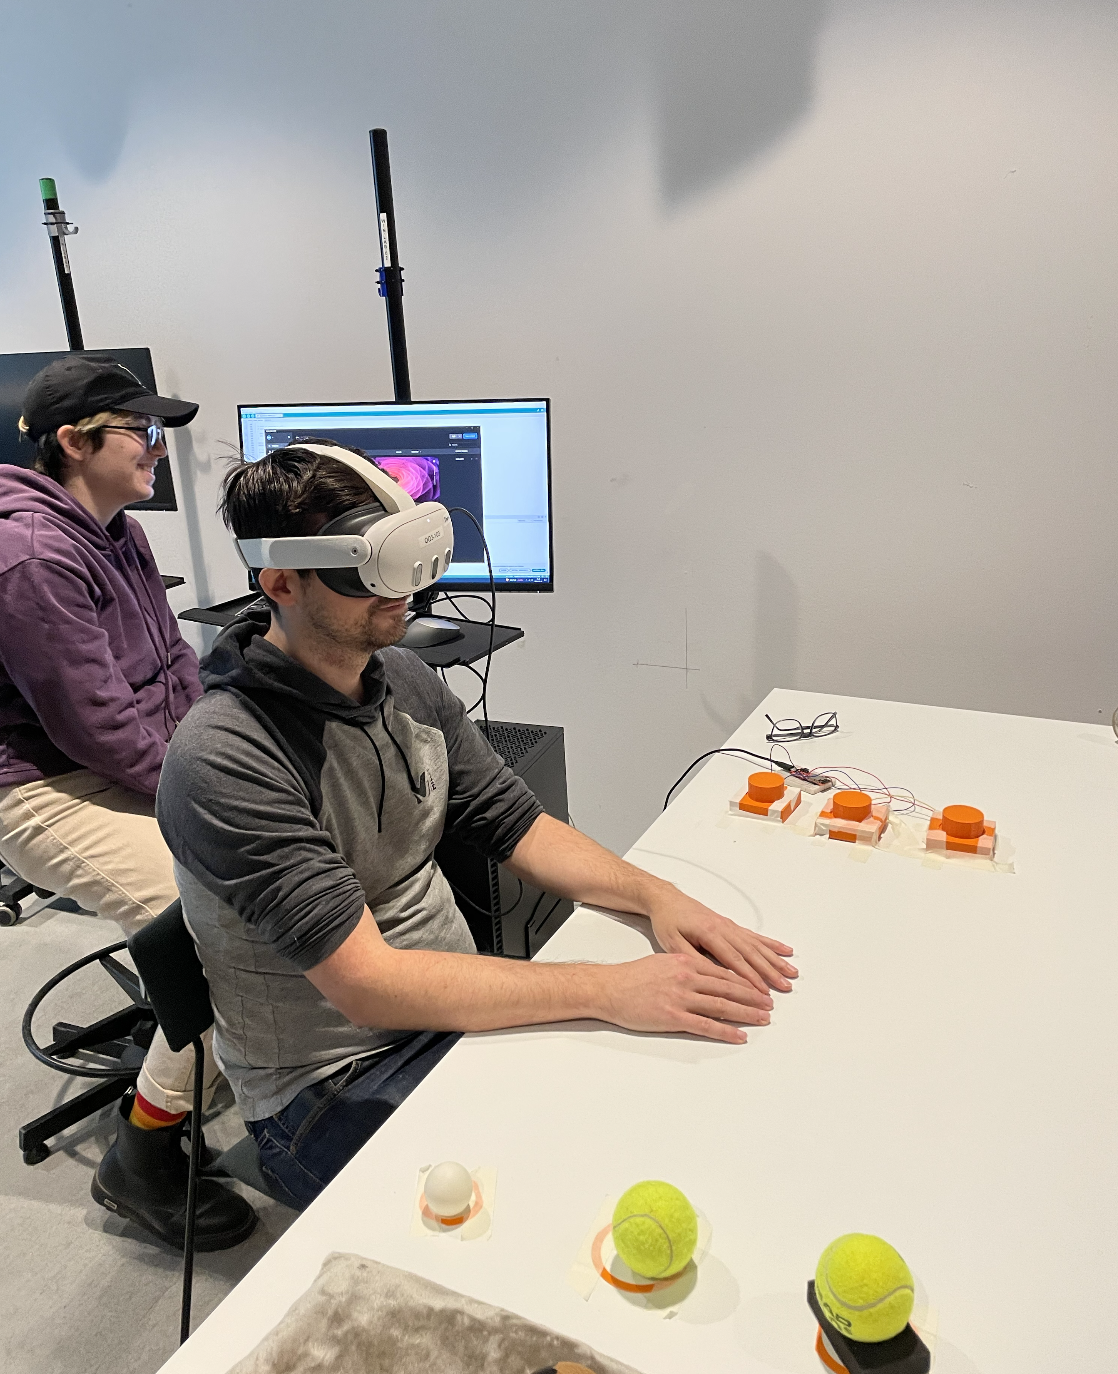
After creating the first prototype of AtomCraft, testing needed to be carried out to improve the experience. User testing was designed to measure the user's level of knowledge about atoms, user's understandability of how to complete task, and overall feedback on the experience. A user testing protocol was created to oversee these variables and can be found in the attachments. Complimentary to the protocol, an Excel file including pre-and post questions, and during experience observations was used to take notes of participants' answers, and can also be found in the attachments. Below you can see pictures from the testing:
Due to a lot of components included in the user testing, specific roles for team members were assigned. The included roles were:
Facilitator
The facilitator will speak with the participant, inform them about the user testing and make sure that they feel comfortable conducting the testing.
Recorder
The recorder will document the testing
Interaction enabler
The interaction enabler make sure that the participant is able to interaction with the physical objects
Technical Support
The technical support person will introduce how to use the headset and make sure that all technical elements are working in the testing.
System description
Features
AtomCraft includes the following features:
- A virtual labotary environment where user's can learn about what atoms consist of
- Virtual and physical components that user's can interact with to complete the task of building different atoms.
- Immersive educational environment for ages 12 and up. AtomCraft is a good educational experience both for the first time learning about atoms but also for repeating the basics.
Watch the demo video Demo Video Or try the live version by downloading this repository.
Installation Requirements and Experience Setup
To install and run AtomCraft on your platform or device, follow the instructions below:
- The experience is possible on using Meta Oculus Quest 2,3 or Pro in a well lit room to ensure hand-tracking.
- Unity version 2022.3.17f1
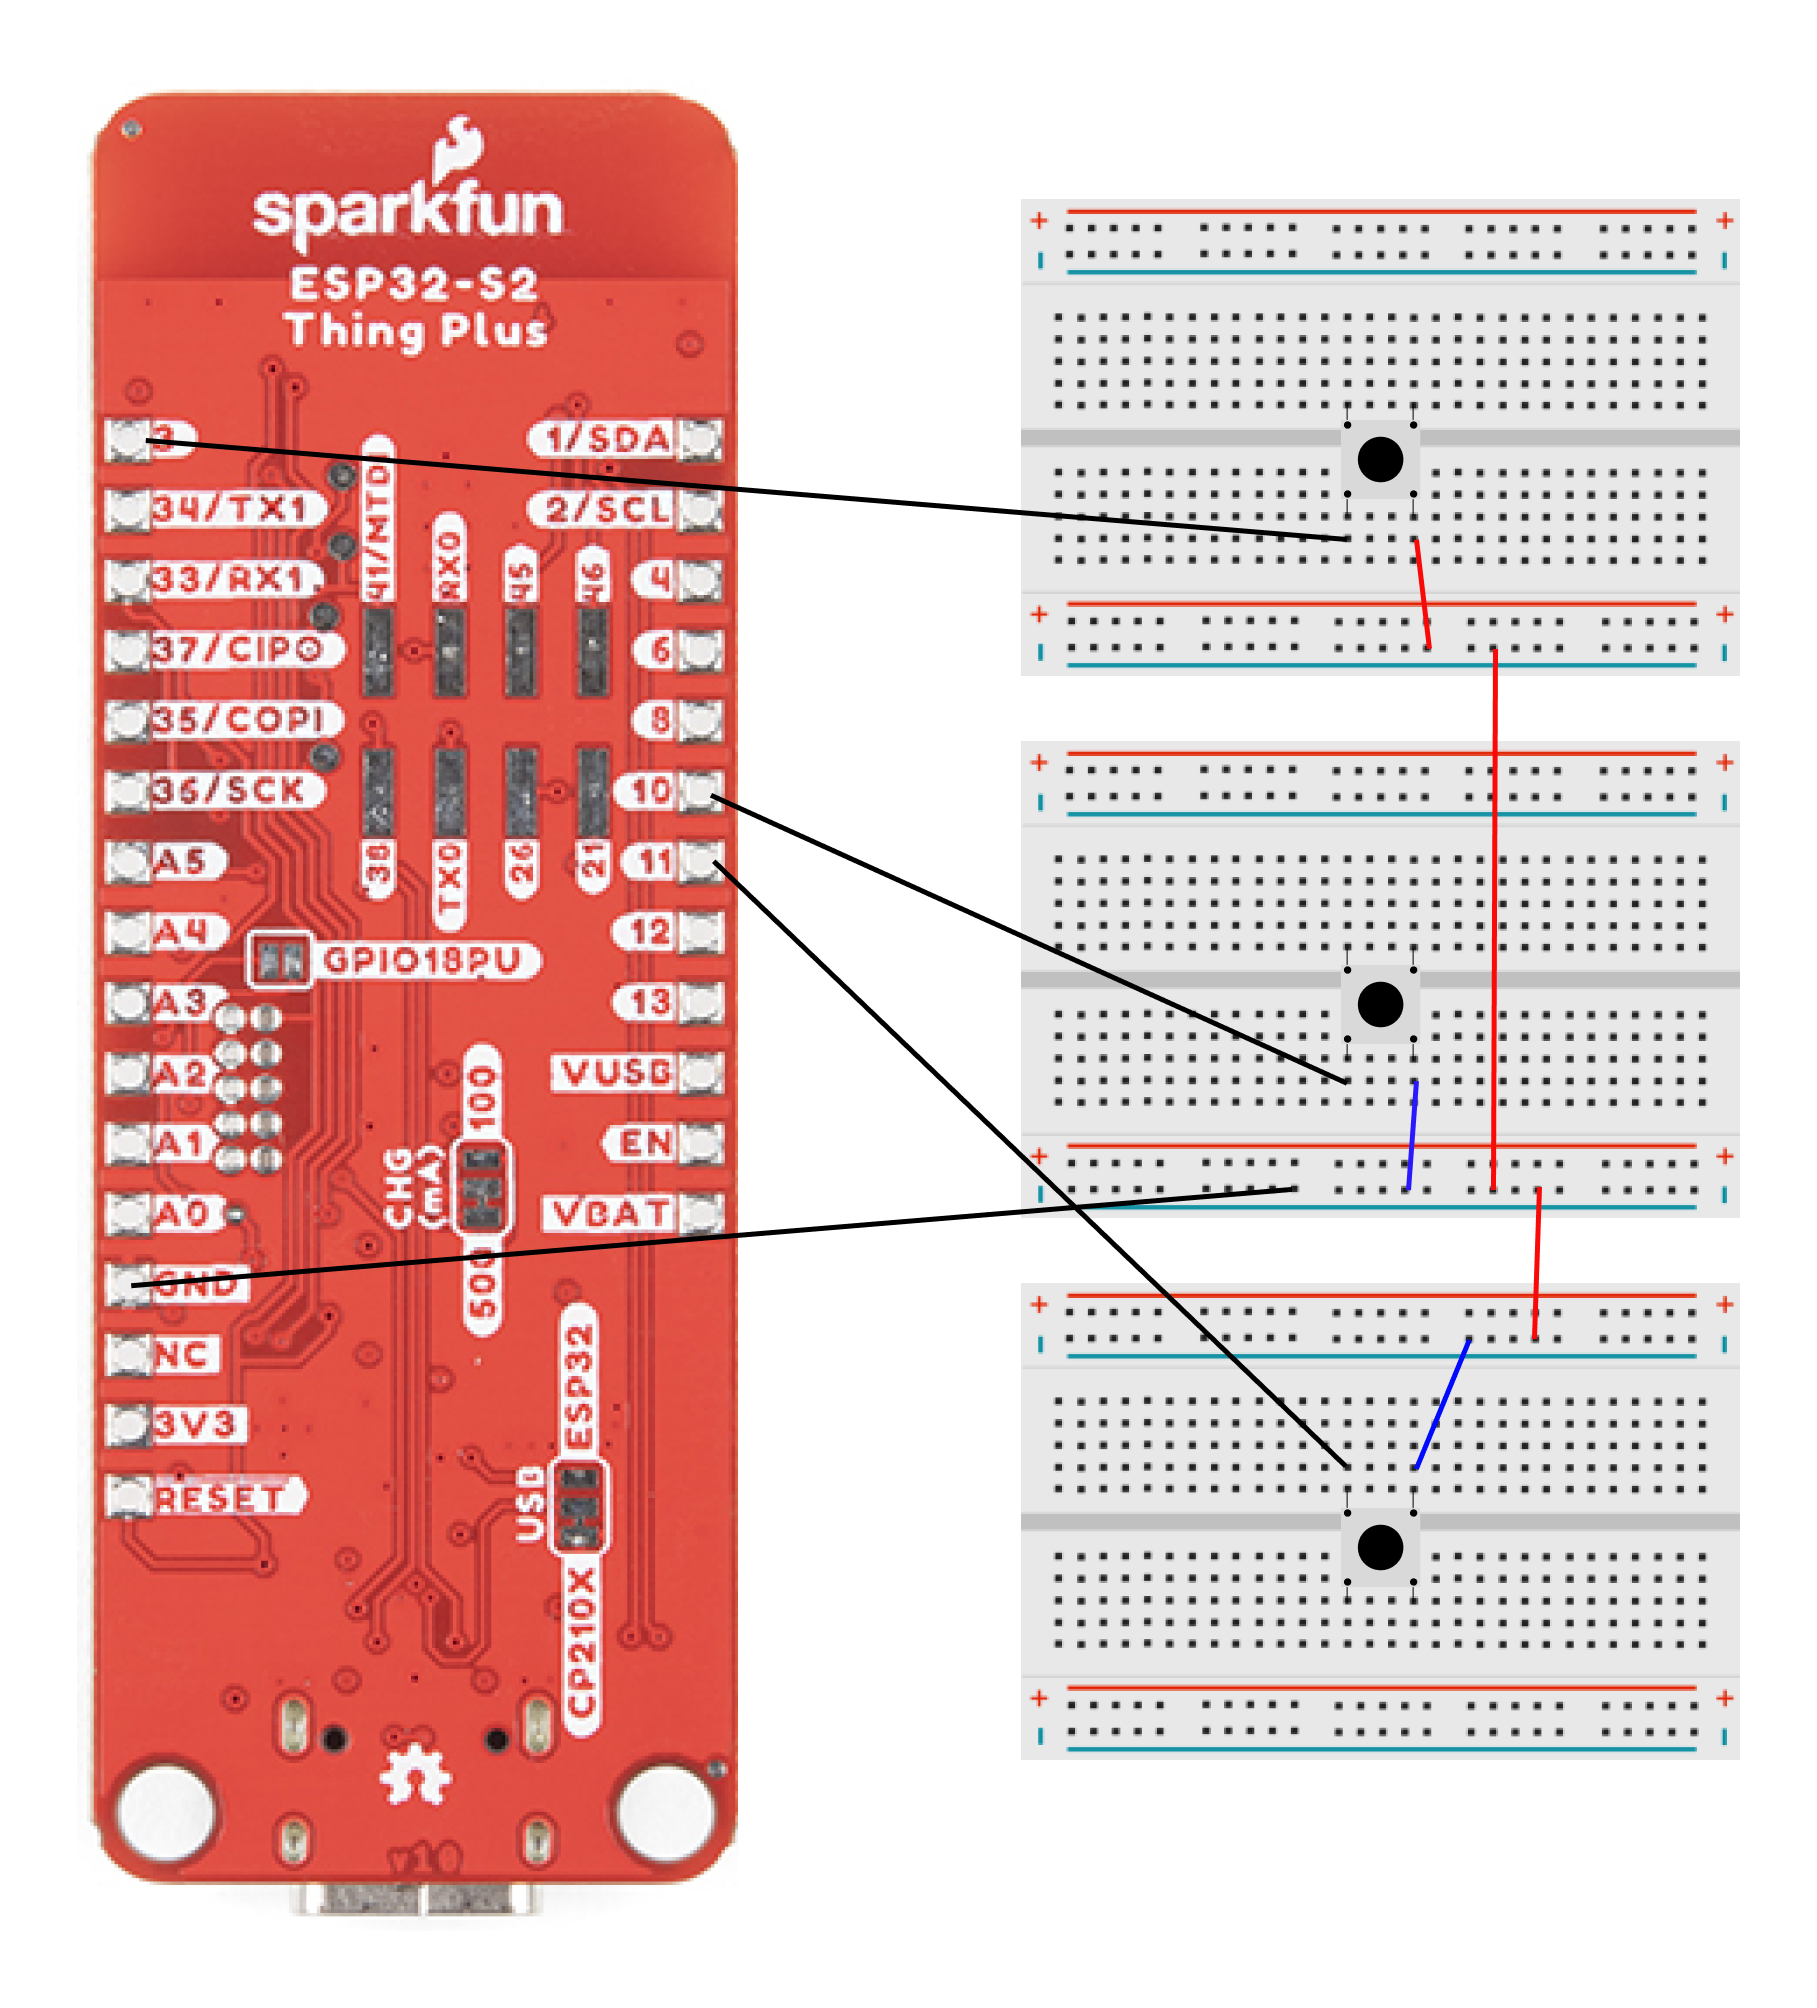
Circuit Board
Please follow the following the circuit board representation to setup the physical buttons. Requirements:
- ESP32-S2 ThingPlus Sparkfun
- 3 breadboards
- 3 Push buttons
- 9 jumper wires
Arduino Code
You can find the Arduino Code in the following file: Esp32_Client_test.ino Esp32_Client_test.ino
Server
The server uses a websocket to exchange messages between Arduino and Unity. You can find the code to run the server on the following link: wbserver.py
Port & IP Address
Make sure to change the port and IP address in the Arduino, Unity and Python.
Experience Setup
Physical components needed for AtomCraft
- Neutrons (physical spheres approximately the size of a standard tennis ball)
- Protons (physical spheres approximately the size of a standard tennis ball)
- Electrons (physical spheres approximately the size of a standard pingpong ball)
- 3D print 3 buttons which is mentioned in section 2.3.4. The 3 buttons which will be matched to the 3 virtual buttons and be used to instantiate the virtual subatomic particles.
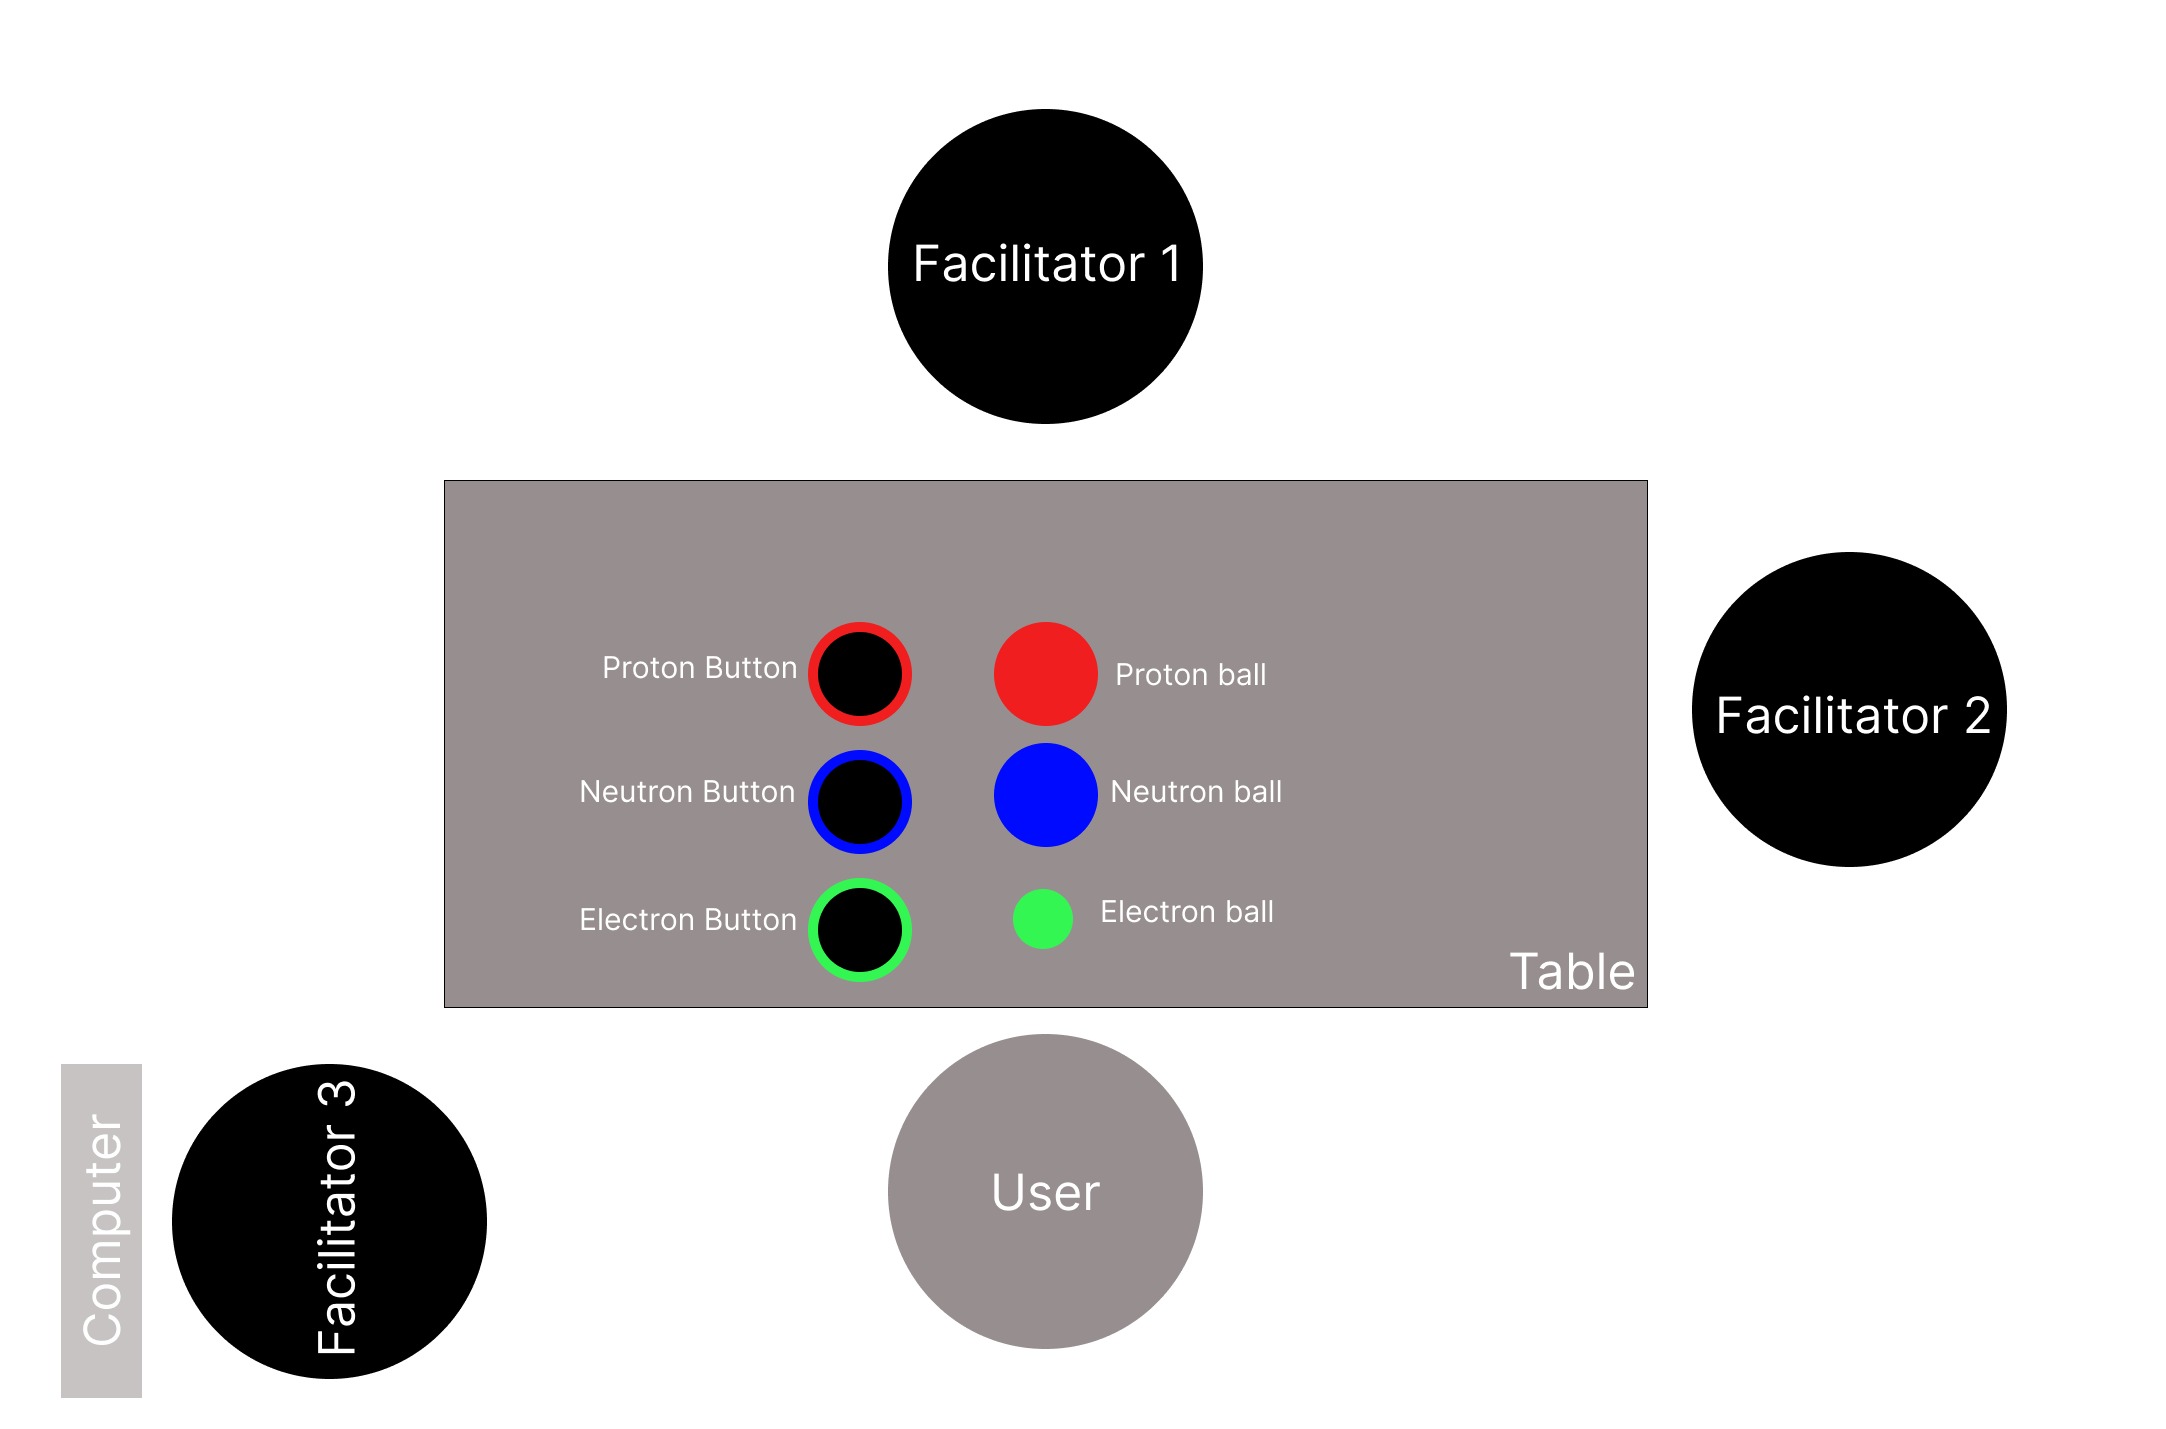
Through wizard-of-oz method, facilitators in the experience will "spawn" a physical subatomic particle at the designated spot. Below you can find the setup of the physical objects and needed facilitators in the experience. To set up this experience, make sure that you have a table that is at least 120cm wide. Set up the experience as seen in the image. Make sure that you have at least 3 facilitators during the experience. Facilitator 1 will catch the physical balls that the user rolls over the table and facilitator 2 will place said physical balls onto its designated spot. Facilitator 3 will be in charge of enabling attaching the virtual subatomic particle to the user's virtual hand. This is carried out by pressing the space button: when the space button is pressed, the instantiated subatomic particle will follow the user's hand and when the space is released the subatomic particle will fly towards the atom that is located in front of the user.
The image below shows all three subatomic particles being located on the table at the same time, but this is only to visualize where they should be placed. Only one subatomic particle will be placed on the table at a time to not confuse the user as to which physical ball should be picked up. After the user has pressed the virtual and physical button (either proton, neutron, or electron), facilitator 2 must quickly place a physical ball at its corresponding pick-up spot.
Usage
To use AtomCraft and interact with its features, follow the guidelines below: Introduction:
- Open AtomCraft on your VR headset. Make sure that the headset uses hand-tracking.
- Press the button "Instructions" to receive the audible instructions.
- Grab the subatomic particles in front of you to receive more information about them.
- Begin the experience by pressing "Start" Start Experience:
- Start by choosing an atom from the menu on your left-hand side
- Your task is to create an atom by rolling its predefined number of subatomic particles to the other side of the table.
- Press the buttons on your left-hand side to spawn subatomic particles. You may only spawn one at a time.
- By rolling the subatomic particle to the other side of the table you can add it to the atom that is in front of you. After the first particle has been rolled, you can see the electron shells around the atom.
- When you have added the correct number of subatomic particles you have completed your task and will receive feedback of completion.
- Repeat steps 5-9 with the other atoms available in the menu.
Some tips and best practices for using AtomCraft effectively:
The tricky thing when not using any markers or trackers with physical and virtual objects is that they can at times become misaligned. Therefore, make sure to match all physical objects with the virtual ones and then reset the scene. A solution that considers this limitation is to enable attachment of the virtual subatomic particle to the user's virtual hand.
References
Physical objects:
- The sphere template is taken from the following:Sphere
- Creator: ark19
- The button template is taken from the following:BIG push button
- Creator: PredatorJr
Assets:
- Chemistry Lab Environment: Chemistry laboratory
- Creator: Chandan kumar singh
- Atom System: Atom System
- Creator: AshJackGames
- Arrow For TCG: Arrow For TCG
- Creator: Lethargica
Contributors
Mina Maddahi
mima4938@student.su.se
Noak Petersson
noak.petersson@dsv.su.se
Portfolio
LinkedIn
Serena Bertaccini
serena.bertaccini@gmail.com
LinkedIn
Tianyu Bao
bty0818@gmail.com
LinkedIn

